Stop Wasting Water: Build Your Own Rainwater System for Free Garden Irrigation
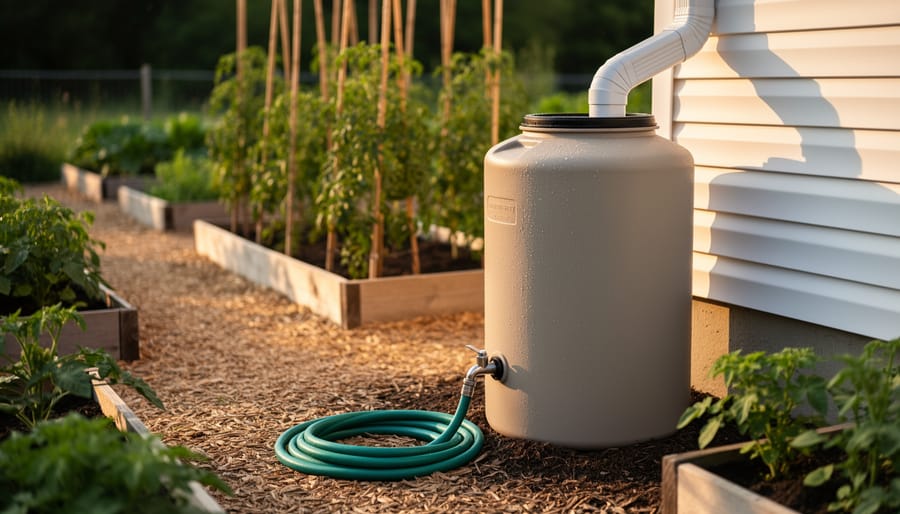
Position your rain barrel beneath a downspout that drains the largest roof section of your home—that’s where you’ll capture the most water with the least effort. Just like checking dryerventcleanexperts.com for home maintenance basics, starting your rainwater harvesting journey begins with one simple observation: how much free water literally flows off your roof every time it rains?
Turns out, a typical 1,000-square-foot roof generates about 600 gallons of water from just one inch of rainfall. That’s enough to keep your tomatoes happy for weeks, and you’re currently letting it run down the driveway. I learned this the expensive way after spending a small fortune on my water bill during a particularly dry summer, watching my garden wilt while perfectly good rainwater disappeared into the storm drain.
The beauty of DIY rainwater harvesting is that you don’t need a degree in plumbing or a massive budget to get started. A basic system costs less than $100 and takes an afternoon to install. You’ll need a food-grade barrel, a simple diverter kit, some screening to keep out mosquitoes and debris, and maybe an overflow hose. That’s it. No complex calculations, no permits in most areas, and definitely no need to hire a professional.
This guide walks you through everything from choosing the right barrel size to connecting multiple containers for expanded capacity, plus the mistakes I made so you can skip straight to the satisfying part: free water for your garden.
Why Bother Collecting Rainwater? (Besides Being Smug About It)
Look, I’ll be honest. When I first started collecting rainwater, part of me just wanted to feel like some kind of eco-warrior. There’s definitely a certain satisfaction in telling dinner guests that your tomatoes were grown with water that fell from the sky. But here’s the thing: beyond the smug factor, rainwater harvesting actually makes a real difference to your wallet and your garden.
First up, your water bill. Depending on where you live and how much you garden, you could knock a decent chunk off those quarterly charges. I’ve saved roughly thirty percent during growing season, which pays for approximately three bags of compost or one fancy garden tool I definitely don’t need but will probably buy anyway.
Then there’s what rainwater does for your plants, and this is where it gets genuinely interesting. Rainwater is naturally soft and free of the chlorine, fluoride, and other chemicals found in tap water. Your plants actually prefer it. I noticed my container plants perked up noticeably after I switched from tap to rainwater. It’s like the difference between drinking filtered water versus something that tastes vaguely of swimming pool. Plants respond better to rainwater, which promotes healthy plant growth across different soil types.
There’s also the environmental angle. Every gallon you collect is one less gallon pulled from increasingly stressed water systems. During droughts, when hosepipe bans kick in, you’ll be sitting pretty with your rainwater stash while your neighbors watch their gardens turn crispy.
Finally, there’s something genuinely empowering about being less dependent on municipal water. When you’ve got a full rain barrel after a good storm, you’ve got insurance against dry spells. It’s one small step toward actual self-sufficiency, without having to go full survivalist and move to a bunker.
Understanding the Basics: How Rainwater Harvesting Actually Works
Here’s the thing about rainwater harvesting: it’s honestly not rocket science. When I first looked into it, I thought I’d need an engineering degree and a trust fund. Turns out, I was overthinking it (shocking, I know). The whole system is basically just catching rain, storing it, and using it later. That’s it. No magic involved.
Think of your roof as a giant funnel. Rain falls on it, rolls down into your gutters, and normally disappears down the drain. That’s your catchment area, which is just a fancy way of saying “the surface that catches rain.” The bigger your roof, the more water you can collect. My tiny garden shed catches way less than my house, but hey, every drop counts.
Those gutters you’ve been ignoring since 2019? They’re actually the delivery system. They channel water from your roof to wherever you want it to go. Mine were full of leaves and what I’m pretty sure was a small bird’s nest, so cleaning them became priority number one. Learn from my mistake: clogged gutters equal no water collection.
Next up is storage, usually a barrel or tank. This is where your collected rainwater hangs out until you need it. I started with a single 55-gallon barrel and felt like a sustainability superhero. You can go bigger or smaller depending on your garden’s thirst and your space.
Finally, there’s distribution, which sounds complicated but really means “how you get water from barrel to plants.” This could be as simple as a spigot at the bottom where you fill watering cans, or you can get fancier with hoses and drip lines. Start simple. You can always upgrade later.
What You’ll Need (And What You Can Skip)
The Essential Kit
Let’s talk about what you’ll actually need to get started. The good news? You probably don’t need a second mortgage to build a basic rainwater harvesting system.
First up, you’ll need rain barrels or large containers. Food-grade plastic barrels work great, and I’ve found some at recycling centers for practically nothing. Just avoid containers that held chemicals unless you enjoy the thrill of mystery garden experiments gone wrong (trust me on this one).
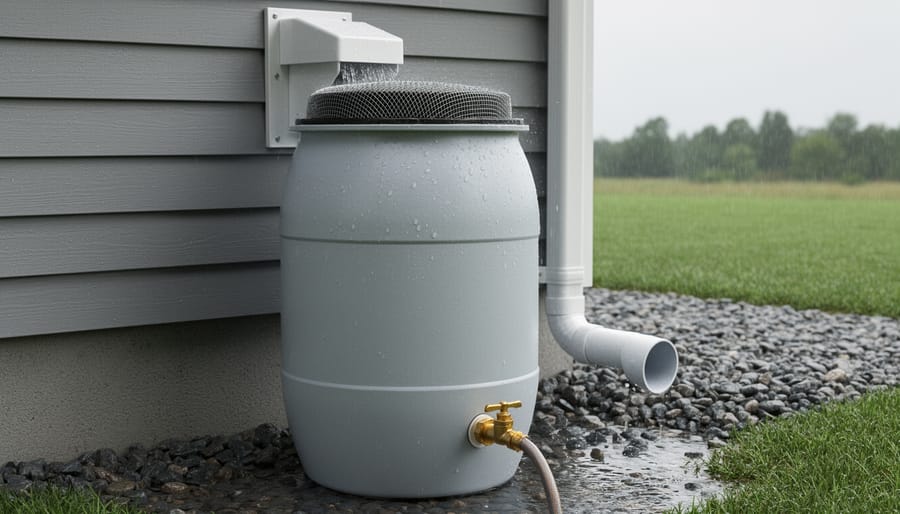
Next, grab a downspout diverter. This handy gadget redirects water from your gutter into your barrel instead of onto your lawn. They’re surprisingly affordable and will save you from awkwardly positioning barrels under dripping downspouts like I did during my first attempt.
You’ll also need an overflow mechanism because Mother Nature doesn’t do portion control during storms. Without one, you’ll have a mini flood situation, which your neighbors won’t appreciate.
Don’t forget a spigot or tap for the bottom of your barrel. This lets you actually use the water you’ve collected, which is kind of the whole point.
Finally, add basic screening or mesh over the top. This keeps out leaves, mosquitoes, and whatever else might think your barrel looks like a great swimming pool. A simple window screen works perfectly and costs almost nothing.
Nice-to-Have Upgrades
Once your basic barrel is up and running, you might get hooked (it happens to the best of us!). Here are some upgrades to consider when you’re ready to level up. Adding a spigot or hose connection near the bottom makes watering super convenient—no more dunking watering cans like you’re drawing water from a medieval well. If your barrel sits lower than your garden, a simple pump can give you better water pressure. I learned this the hard way after hauling heavy watering cans uphill all summer like some kind of overly ambitious pack mule. Linking multiple barrels together with overflow hoses maximizes your storage capacity, which is brilliant during rainy stretches. And if you’re feeling fancy, a basic mesh filter or screen at the downspout connection keeps leaves and debris out, meaning less scooping and fewer mosquito hotels. None of these upgrades are essential, but they can make your system more efficient and user-friendly as you gain confidence.
The Scavenger’s Shopping List
You don’t need to raid a plumbing supply store to build a rainwater harvesting system. Some of my best finds have come from unexpected places. Check with local restaurants, bakeries, or delis for food-grade plastic barrels and buckets. These businesses often toss containers that held pickles, olives, or cooking ingredients. Just give them a thorough cleaning first, trust me on this one.
Cruise Craigslist, Facebook Marketplace, and Freecycle for rain barrels and guttering. People constantly upgrade their homes and give away perfectly good materials. I once scored 20 feet of gutter for free because someone’s contractor over-ordered.
Don’t overlook garage sales and community swap meets either. You’ll find spigots, flexible tubing, and connectors for pennies on the dollar. Hardware stores sometimes sell slightly damaged downspouts at deep discounts, and honestly, a small dent won’t affect performance.
Even your own household trash can contribute. Large yogurt containers and gallon milk jugs make excellent overflow diverters or small-scale collection experiments before you commit to the full system.
Setting Up Your System: A Step-by-Step Walkthrough
Choosing the Perfect Spot (Or the Least Terrible One)
Finding the right spot for your rain barrel is like choosing a parking space at the grocery store—it’s all about compromise. The dream location? Right next to a downspout, on perfectly level ground, with easy access to your garden. Reality? You’ll probably get two out of three if you’re lucky.
Start by scoping out your downspouts. The closer your barrel sits to one, the less DIY plumbing gymnastics you’ll need to perform. I learned this the hard way after installing mine fifteen feet away from the nearest downspout, requiring enough connectors and tubing to make a plumber weep.
Level ground matters more than you’d think. A wobbly barrel is a disaster waiting to happen—picture 50 gallons of water tipping over onto your prize tomatoes at 2 AM. Use a level or the tried-and-true “eyeball it really carefully” method if you’re feeling confident.
Garden proximity is your friend when you’re lugging a watering can or dragging a hose. Future-you will appreciate past-you’s thoughtfulness here.
Finally, mosquito prevention starts with location. Choose spots where you can easily access the barrel to check screens and fittings. Mosquitoes love standing water like I love avoiding yard work—passionately and without shame.
Preparing Your Rain Barrel
Before your barrel collects its first drop of rain, you’ll need to give it some TLC. Trust me, I learned this the hard way when I skipped the cleaning step and ended up with water that smelled like a pickle factory (yes, I used an old food-grade barrel without proper prep).
Start by thoroughly scrubbing your barrel inside and out with a mixture of water and white vinegar or mild dish soap. Rinse it completely until there’s no residue or smell left. If you’re using a repurposed container, make absolutely certain it never held anything toxic. Food-grade containers are your safest bet.
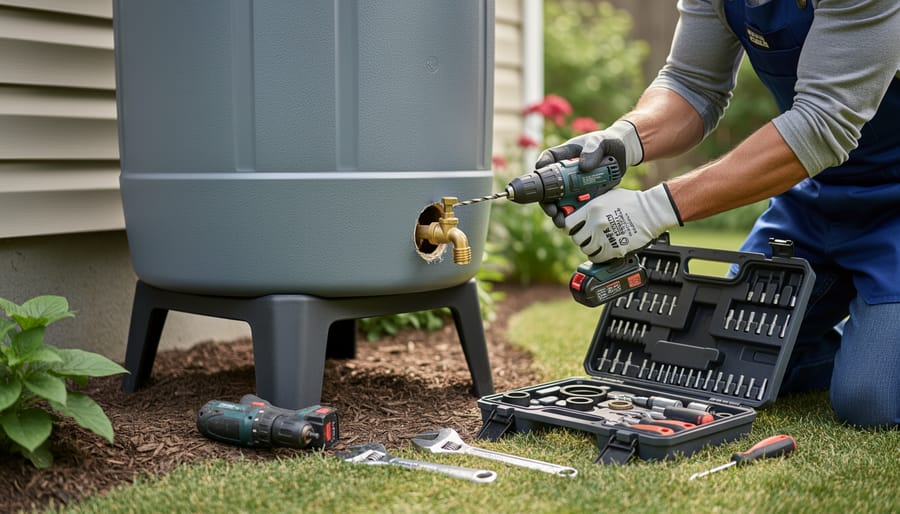
Next up is installing your spigot, which sounds intimidating but really isn’t. You’ll drill a hole about 4 inches from the bottom of the barrel, just large enough for your spigot fitting. Apply plumber’s tape to the threads, insert the spigot from the outside, and secure it with the washer and nut on the inside. Hand-tight plus a quarter turn with pliers is usually perfect. Don’t overtighten or you’ll crack the barrel like I did on attempt number two.
The overflow pipe is crucial because barrels fill faster than you’d think during heavy rain. Drill another hole near the top and install a threaded adapter with a short length of garden hose attached. Direct this away from your home’s foundation.
Finally, cover the top opening with fine mesh screening, secured with bungee cords or zip ties. This keeps out leaves, mosquitoes, and curious critters who might fancy a swim.
Connecting to Your Downspout
Now comes the fun part—connecting your downspout to your collection barrel! This is where your system really starts coming together, and honestly, it’s easier than you might think.
The simplest approach is installing a diverter kit, which you can grab at any hardware store for around $25-40. These clever gadgets attach to your downspout and automatically redirect water into your barrel. When the barrel fills up, excess water continues down the original downspout path. No flooding, no worries! Just follow the included instructions, which typically involve cutting your downspout at the right height and attaching the diverter with the provided hardware.
If you’re feeling more adventurous (or frugal), you can DIY this connection by cutting your downspout about 6 inches above your barrel’s top and positioning a section of flexible downspout extension to guide water through a hole you’ve drilled in the lid. Either way works great.
Here’s something I learned the messy way: you definitely want a first-flush diverter. The first few gallons of water wash all the bird droppings, leaves, and roof gunk into your system—not exactly what your tomatoes ordered! A first-flush system captures this initial dirty water in a separate chamber that you empty periodically. You can buy these pre-made or create a simple version using a small vertical pipe with a slow-release valve at the bottom. Trust me, your garden will thank you for cleaner water, and you’ll avoid that “surprise sludge” situation I experienced my first season.
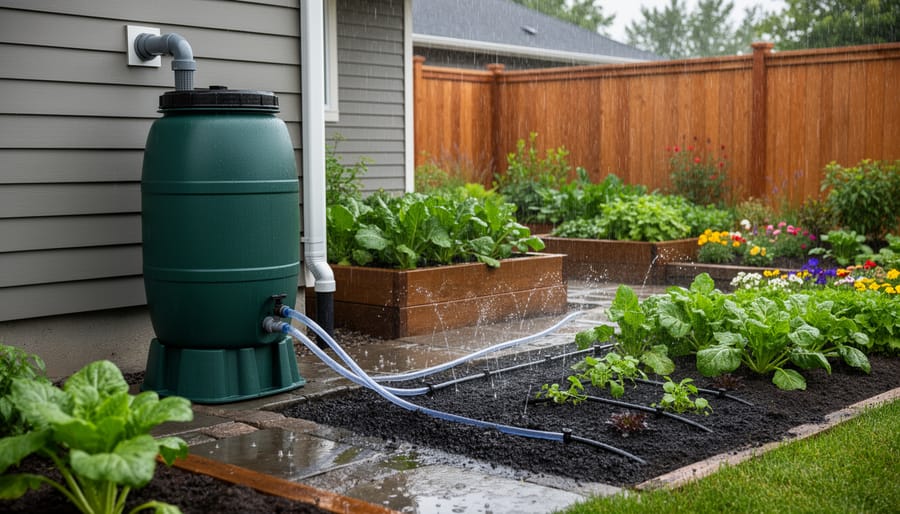
Creating the Distribution System
Getting water from your barrel to your thirsty plants is wonderfully straightforward. The simplest option? Fill a watering can directly from your spigot and carry it around like our gardening ancestors did. No judgment here—I still do this for my potted plants because it feels satisfyingly productive.
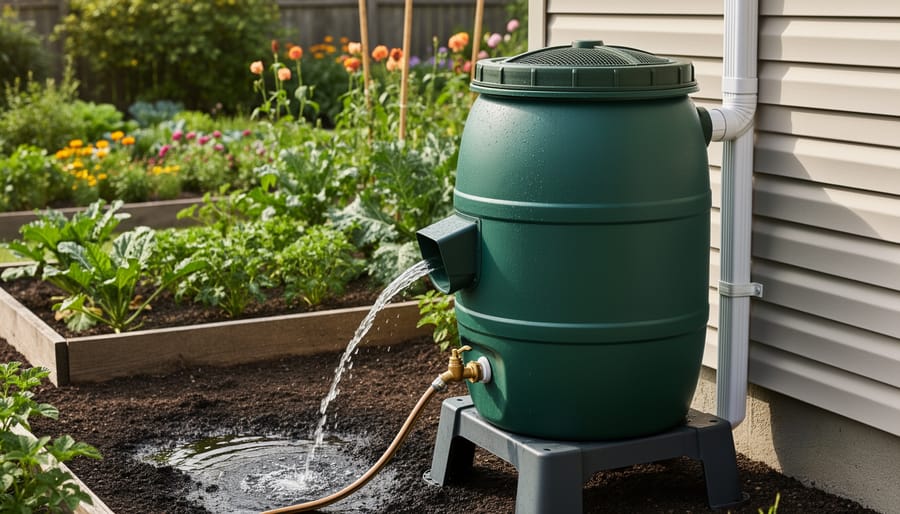
For a hands-off approach, gravity does the heavy lifting. Position your barrel on a stand or platform (remember that elevation we talked about?) and connect a regular garden hose to the spigot. The higher your barrel, the better your water pressure. I learned this the hard way when my ground-level barrel produced a sad dribble that made me question my life choices.
Drip irrigation is the gold standard for efficiency. Buy an inexpensive drip irrigation kit from any garden center, attach it to your barrel’s spigot, and snake the tubing through your garden beds. These systems deliver water directly to plant roots with minimal waste. Add a watering timer for true set-it-and-forget-it convenience.
Soaker hoses work brilliantly too—just connect them to your barrel and lay them along plant rows. They seep water slowly into the soil, perfect for vegetable gardens and flower beds.
Common Mistakes I Made (So You Don’t Have To)
Let me tell you about the time I thought I’d nailed my rain barrel setup, only to discover my backyard had become a swamp after one good storm. Why? I completely forgot about overflow outlets. Rookie move! The lesson: always install an overflow hose or spigot near the top of your barrel. Otherwise, that water’s going somewhere, and it probably won’t be somewhere you like.
Then there’s the Great Mosquito Farm Incident of my first summer. I was so proud of my harvested water until I noticed clouds of mosquitoes throwing pool parties in my barrel. Turns out, a piece of old window screen held down with a bungee cord isn’t quite enough. You need proper fine mesh screening that’s actually sealed around the top, not just draped over it. Those little bloodsuckers can find entry points smaller than you’d think. Add a tablespoon of vegetable oil on the water surface if you’re really paranoid, but good screening is your first defense.
My third brilliant mistake involved placing a 400-pound rain barrel on uneven ground. Physics happened. The barrel slowly tipped over the course of a week, and I woke up to a waterfall feature I definitely didn’t order. Rain barrels need level, stable platforms. Concrete blocks, gravel bases, or proper wooden platforms are your friends here. Don’t just plunk it down and hope for the best.
Finally, winter prep nearly cost me a barrel. Water expands when it freezes, and I learned this expensive lesson when mine cracked like an egg. Now I drain my barrels before the first hard freeze, disconnect the downspouts, and store them upside down. Ten minutes of fall maintenance beats buying replacements every spring.
Learn from my chaos. Your garden will thank you, and your wallet definitely will too.
Keeping Your System Running Smoothly
Here’s the good news: maintaining your rainwater system is way less dramatic than I’m making it sound. Think of it as giving your garden helper a quick health check every few months rather than performing major surgery.
Spring is your inspection season. Once the snow melts (or the pollen stops attacking everything), peek inside your barrel. I learned this the hard way when I discovered a family of leaves had thrown a winter party in mine. Scoop out any debris, give the inside a scrub with a diluted vinegar solution, and check that your screens are intact. Those screens are your first defense against mosquitoes, so patch any holes immediately.
Speaking of mosquitoes, let’s talk about keeping your barrel from becoming a bug resort. A tight-fitting lid and proper screening solve 90% of the problem. For extra insurance, drop a mosquito dunk in the water—it’s a harmless bacterial treatment that targets mosquito larvae but won’t hurt your plants or beneficial insects. I add one every month during warm weather, and it costs less than a fancy coffee.
Summer maintenance is basically making sure water flows properly. If your barrel seems slow to fill, check for clogged screens or downspouts. Your garden will thank you for keeping things running smoothly, especially during dry spells when every drop counts. You might even want to use moisture meters to track exactly how much your stored water helps.
Before winter arrives, drain your barrel completely unless you live somewhere warm year-round. Frozen water expands, and I’ve seen cracked barrels that looked like someone attacked them with a sledgehammer. Disconnect hoses, flip the barrel upside down, and call it good until spring.
Taking It Further: Expansion Ideas for the Ambitious
Once you’ve gotten comfortable with a basic rain barrel setup, you might find yourself eyeing those downspouts like they’re untapped goldmines. Good news: scaling up is absolutely doable, and honestly kind of addictive once you start.
Linking multiple barrels together is your simplest expansion move. Connect them with overflow hoses near the top, and they’ll automatically balance water levels between containers. I added a second barrel after my first summer and felt like a genius watching them work in tandem. Just make sure they’re on level ground, or you’ll discover physics lessons you didn’t sign up for.
For the really ambitious, underground cisterns can store hundreds or thousands of gallons without cluttering your yard. They’re pricier upfront and involve actual digging, but they’re invisible and keep water cooler. This is definitely a weekend project that might stretch into a month, depending on your enthusiasm for manual labor.
Automated pumping systems take things to the next level. Pair a small electric pump with automated watering timers, and you’ve basically built a mini irrigation network that runs itself. Drip lines or soaker hoses throughout your garden beds mean you can vacation without guilt.
Fair warning: each expansion scratches an itch you didn’t know you had. Start small, see what works, and expand when your current setup feels limiting. There’s no prize for most complicated system, just better-watered plants.
So there you have it – your roadmap to becoming a rainwater-collecting, garden-watering champion! Look, your first setup probably won’t look like something from a fancy sustainable living magazine, and that’s completely okay. Mine looked like a science experiment gone wrong for the first few months, complete with a barrel that tipped over during a windstorm (learned that lesson the hard way). But you know what? It still caught water, and my tomatoes didn’t care about aesthetics.
Start with one barrel. Maybe two if you’re feeling ambitious. The beauty of this whole endeavor is that you can expand as you learn, and you will learn – mostly by doing things slightly wrong first, which honestly makes for better stories anyway.
Between lower water bills and healthier plants thriving on chemical-free rainwater, you’re making a genuine difference for your wallet and the planet. Every gallon you catch is one less gallon pulled from municipal systems or underground aquifers.
Now I’d love to hear from you! Have you tried rainwater harvesting? Got any hilarious mishaps or unexpected wins to share? Drop a comment below and let’s learn from each other’s adventures.

